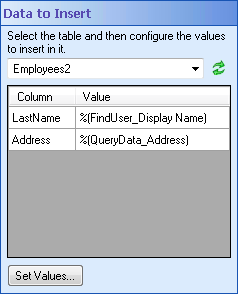
Data to Insert
This property box determines what row values will be inserted into a database with the Insert Data activity.
Note: You must configure the Data Source property box before configuring this property box.
To configure Data to Insert
- Add the Insert Data activity to your workflow definition by dragging it from the Toolbox Pane and dropping it in the Designer Pane.
- Select the activity in the Designer Pane.
- Under
 Data to Insert in the Properties Pane, select a table from the drop-down menu.
- Optional: Click Refresh to update the list of tables, if you have made changes to the data source.
- Click Set Values or anywhere in the dark gray box, to open the Data to Insert dialog box.
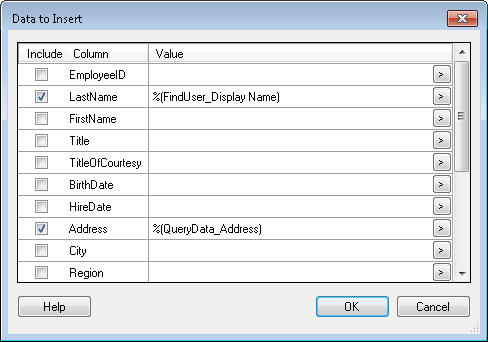
- Select the boxes next to the Columns for which you want to specify values in the inserted row. Hold down the SHIFT or CTRL key to select multiple rows at once.
- Type in a value next to the Columns you selected, or click the Token button (right arrow)
 to use tokens.
Tip: If you want a token to be replaced by DB.NULL in the case that the token's value is blank (the empty string), apply the NULL token formatting expression. If you want to set a column's value to DB.NULL regardless, insert the NULL token: %(DB.NULL).
- Click OK.